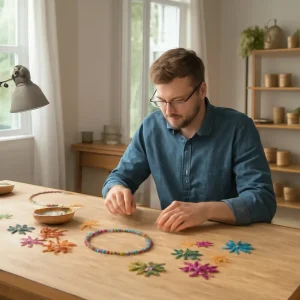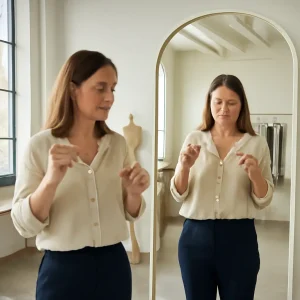
A beaded bracelet fits best when its finished inside circumference leaves enough room for the beads to move comfortably without sliding excessively over the hand. To measure your wrist, wrap a flexible tape or a strip of paper snugly around the spot where you’ll wear the bracelet, record the circumference, then add ease according to your preferred fit and the beads’ size. This guide explains how to measure accurately, choose a fit allowance, account for bead dimensions and bracelet construction, and check the finished fit. The method matters because a wrist measurement is only a starting point: the bracelet’s interior size, bead bulk, and wearing preference all affect comfort.
Measure wrist circumference for a beaded bracelet fit
Wrist circumference is the distance around the wrist at the point where a bracelet will sit. Measure the wrist itself—not over a watch, sleeve, or existing bracelet—because those items add size and can distort the result. Jewelry retailers commonly use wrist circumference as the starting measurement, then add a fit allowance to determine the bracelet’s finished inside circumference. There is no single universally correct allowance: a close fit, a standard fit, and a loose fit feel different, and large beads can make the same circumference feel tighter than a fine, smooth strand.
Choose the correct measuring point
Measure just below the wrist bone, around the narrow area where you expect the bracelet to rest. Keep your hand relaxed and your fingers natural; making a fist can change the shape and tension of the wrist. If you want the bracelet to pass over the widest part of your hand, check that it can do so as well—especially for a rigid bangle or a bracelet with a small opening.
Use a flexible tape or paper strip
A soft measuring tape gives a direct circumference reading. Wrap it around the wrist so it touches the skin without compressing it, then note the measurement where the tape meets its starting point. If you do not have a tape, wrap a narrow strip of paper or non-stretch string around your wrist, mark the overlap, and measure the strip against a ruler. Avoid stretchy yarn or elastic, which can lengthen under tension and produce an inaccurate result.
Repeat the measurement
Take the measurement two or three times and use the consistent reading. If the readings differ, check that the tape is level, the wrist is relaxed, and the strip is snug rather than tight. For a gift or an online order, record the actual wrist circumference and the desired fit separately; a wrist measurement is not the same as a bracelet’s finished size.
Choose bracelet ease for comfort
Bracelet ease is the additional room between the wrist circumference and the bracelet’s finished inside circumference. In practical sizing, a close fit allows little movement, a standard fit allows comfortable movement, and a loose fit lets the bracelet shift more freely. Jewelers and makers often offer general starting allowances, but these are guidelines rather than a regulated sizing standard. Use them as a first estimate, then account for bead size and personal preference.
Close, standard, and loose fits
For a starting point, many bracelet-sizing guides suggest adding about ¼ inch (0.6 cm) for a close fit, ½ inch (1.3 cm) for a standard fit, or ¾ inch (1.9 cm) for a looser fit. These commonly used increments are not universal: different sellers may define fit categories differently, and a clasp or bead shape can affect how a bracelet wears. If possible, compare with a bracelet you already find comfortable, measuring its inside circumference rather than its end-to-end length.
Account for bead size and shape
Large or irregular beads occupy more space around the wrist and may feel bulkier than small, rounded beads at the same inside circumference. A strand of chunky beads may need more ease than a fine seed-bead bracelet, while flat beads can sit differently from round ones. When ordering a handmade bracelet, ask whether the maker’s stated measurement refers to the inside circumference, the strand length before stringing, or the bracelet laid flat; these measurements are not interchangeable.
Consider movement, temperature, and daily wear
A bracelet that feels comfortable at one moment may feel tighter when the wrist is warm or after activity. For everyday wear, leave enough room to move without making the bracelet so loose that it catches on clothing or knocks against hard surfaces. If your wrist measurement falls between sizes, choose based on the bracelet’s construction and the fit you prefer; an adjustable clasp or extender can provide flexibility.
Convert your wrist measurement into a finished size
To estimate a bracelet size, add your chosen ease to your wrist circumference. For example, if your wrist measures 6½ inches and you want a standard starting fit, adding ½ inch gives an estimated finished inside circumference of 7 inches. Treat this as a practical estimate, not a guarantee: thick beads, knots, spacers, and clasp design can change how the bracelet sits.
Keep circumference and length distinct
Circumference measures the distance around a circle; a bracelet’s flat length is measured from end to end. A clasp may add to the overall length without increasing the usable inside circumference by the same amount. For a strand without a clasp, the cord or wire length can also differ from the finished inner measurement because beads occupy space and curve around the wrist.
Check the fit with a paper template or sample strand
You can test the estimated size before buying or stringing beads. Mark the planned circumference on a strip of paper and form it into a loop, or arrange a sample strand to the intended finished measurement. Slip it onto the wrist and assess whether it moves comfortably, stays in place, and passes over the hand if necessary. This simple check is especially helpful for custom pieces, where bead size and clasp placement may limit later adjustments.
Troubleshoot common bracelet-measuring mistakes
Small measuring errors can noticeably affect a bracelet’s comfort. A tape pulled too tight understates the wrist size; a loose tape or stretchy string overstates it. Measuring over clothing, choosing the wrong wrist location, or confusing the wrist measurement with the finished bracelet measurement can also lead to a poor fit.
If the bracelet is too tight
Check whether the size listed is the bracelet’s inside circumference and whether the design includes bulky beads or a clasp. If the bracelet is adjustable, use an extender or move the clasp to a longer setting. For a fixed-size piece, ask a jeweler or maker whether it can be resized or restrung; do not force a beaded strand, since excessive tension can damage the cord or elastic.
If the bracelet is too loose
A loose bracelet may slide over the hand, catch on sleeves, or strike nearby objects. For an adjustable design, shorten the closure or use a removable link if the construction allows. If you are commissioning a bracelet, share both your wrist circumference and a clear description of the preferred fit, such as “close” or “room to move,” rather than requesting a size without context.
Conclusion: measure, add ease, and test the fit
For a comfortable beaded bracelet, measure the wrist at the intended wearing point with a non-stretch tape or paper strip, repeat the measurement, and add ease suited to your preferred fit. Then consider bead size, bracelet construction, and whether the piece must pass over your hand. A sample loop or comparison with a bracelet you already like can help validate the estimate before you buy or make the finished piece. Measure both wrists if you are unsure, record the circumference clearly, and confirm with the seller or maker how their bracelet size is defined.
Sources: GIA, Jewelry Care and Cleaning Guide, https://www.gia.edu/gia-news-research-jewelry-care-cleaning; James Avery Artisan Jewelry, Bracelet Size Guide, https://www.jamesavery.com/pages/bracelet-size-guide; Pandora, Bracelet Size Guide, https://us.pandora.net/en/size-guide/bracelets/bracelet-size-guide.html.